In Flux: More Than You Ever Wanted To Know About Crafting Strong Solder Joints
Lane Sparber
Soldering: it’s the great humbler for anyone beginning their journey into the wild and wonderful world of electronics. Whilst it is not a particularly difficult skill to master, there IS an art to doing it correctly, and my goal here is to guide the beginners and intermediates as to the (subjectively) best ways to master excellent soldering skills.
SAFETY FIRST
Before we start this discussion, be advised: there ARE dangers here and you’ll need to take some basic precautions. First of all, we’ll be dealing with extreme heat. The business end of a soldering tool can be anywhere from 300-900 degrees Fahrenheit, depending on the iron’s wattage (more on that below). You MUST be careful and aware of everything around you when soldering. Why, I myself have inadvertently burned my workbench when not paying attention (bad), burned myself (worse), and burned my wife’s dining room tablecloth and the table beneath it (the worst - we…well we won’t be discussing THAT incident at ALL here) before I had a real workshop. There is a very real possibility of bodily injury, so be sure to treat your soldering tools with the respect they demand, or you WILL eventually pay a price. Go ahead. Ask me how I know.
In addition, molten solder gives off fumes, and it’s best to not breathe them directly. You can either hold your breath or move your face out of range when you solder - it dissipates very rapidly - or wear a mask (we all have plenty of THOSE now, don’t we???). Simple as that.
Finally, solder can spit when heated, and you don’t want those little bits or molten metal or flux landing on you or your work - ESPECIALLY if you’re working on a guitar. When solder spits onto a guitar finish, often it permanently mars it. So, protect yourself with long sleeves and goggles if you’re starting out, and they’re not a bad idea for us veterans, either! In the guitar scenario described above, I cover the entire surrounding areas of the instrument with rags or swatches of cloth to protect them.
WHAT IS SOLDERING?
In the simplest terms possible, soldering involves melting a metal alloy (the solder itself) with a relatively low melting point to join two or more OTHER metals together. For our purposes this involves joining electrical components to make a new, stable electronic connection between them. There are, of course, other uses for soldering in other fields (plumbing, jewelry, etc), however if you’re looking for tips in those domains, I humbly suggest that you MAY have stumbled onto the wrong website. At any rate, pretty much ANY electrical device that contains more than one component has solder inside of it. This goes for amps (regardless of construction methods), pedals, electronic instruments, and even your cables.
WHAT IS SOLDER?
Solder is the metal alloy that we’ll be working directly with. Most solder comes in a long string that’s wrapped around a bobbin, and it almost always has a hollow center filled with either acid or flux.
Acid core solder is used in other disciplines; we don’t use it for electronics work, so stay away from that type of solder. If you DO use acid core solder for anything, just be advised that you can’t share that equipment with what you use for electronic applications. For example, if you’ve just used your soldering iron with acid core solder, you’ll have to change the tip of the iron out to solder anything we’re about to discuss here.
Flux core solder is filled with…you guessed it…flux. Why is it there? What is it? Flux aids the solder process by removing any films that build up on the metals as they’re heated. This helps to ensure a solid joint with excellent conductivity. It also provides a bit of moisture, making the molten solder flow much more effectively. There are also different ratios of solder to flux that you can buy. I exclusively use the 60/40 solder-to-flux ratio, as it’s extremely effective and also the most common. Now, flux is a great thing all around, but if there’s excessive flux around the joints when you’re done, you may need to clean it up a bit, as it can trap contaminants and cause all sorts of mayhem - especially if it becomes conductive. Fortunately, store bought isopropyl alcohol (you may even have some in your medicine cabinet right now) cleans it up nicely - just make sure it’s the 91-99.9% pure variety. More on this topic in a bit.
Solder is available in different thicknesses. I stock three different diameters in my shop (for the record, I use Kester brand solder exclusively - it’s the best I’ve tried). I have a spool of VERY narrow .020” diameter solder that’s perfect for tiny solder joints and S.M.D. (surface mount) work. I have a spool of medium thickness .031” solder that I use for circuit board work, and finally I stock a roll of hefty .062” solder that’s for larger scale amp work. Now, you don’t HAVE to stock various diameters like I do - especially if you’re only going to be an occasional solder jockey; you can make almost any thickness work for almost any application if you need to. I just like the convenience of having the choice and it speeds up my workflow considerably.
The solder I describe above does contain lead, which is bad for the environment. As such, there’s been a push in the industry to use lead free solder. I’m not a fan of it personally, as most current lead-free solder tends to be brittle, it doesn’t bond as well, and has a MUCH higher melting point than its lead containing counterpart. If you want to use this type of solder, expect to spend some extra time getting familiar with its particular quirks.

Two representative rolls of solder in different thicknesses and lengths - “fun sized” and industrial quantities.
TOOLS OF THE TRADE
Now that you know more about solder itself than you’d ever dreamed possible, we come to the thingamajigs and whatsits we use to melt said solder. It should be no surprise that there are many, MANY soldering guns and irons out there, and they all have their purposes. They fall into two very general categories: soldering guns and soldering irons/pencils.
Soldering guns look just how you’d think they look. They have a vertical handle with a trigger, and the heating element is at a right angle to the trigger, just like the barrel on a firearm. Most even have built-in lights that illuminate the work as the trigger is squeezed. For 90% or better of the work WE do in music electronics, these guns are outdated, unwieldy, and WAY too high-powered for general use. That said, I myself DO have one or two, but they mostly sit in their boxes. I’m glad I have them for when I’m in a pinch, but the novice electronics tech need not worry about them or purchase one until much later on.

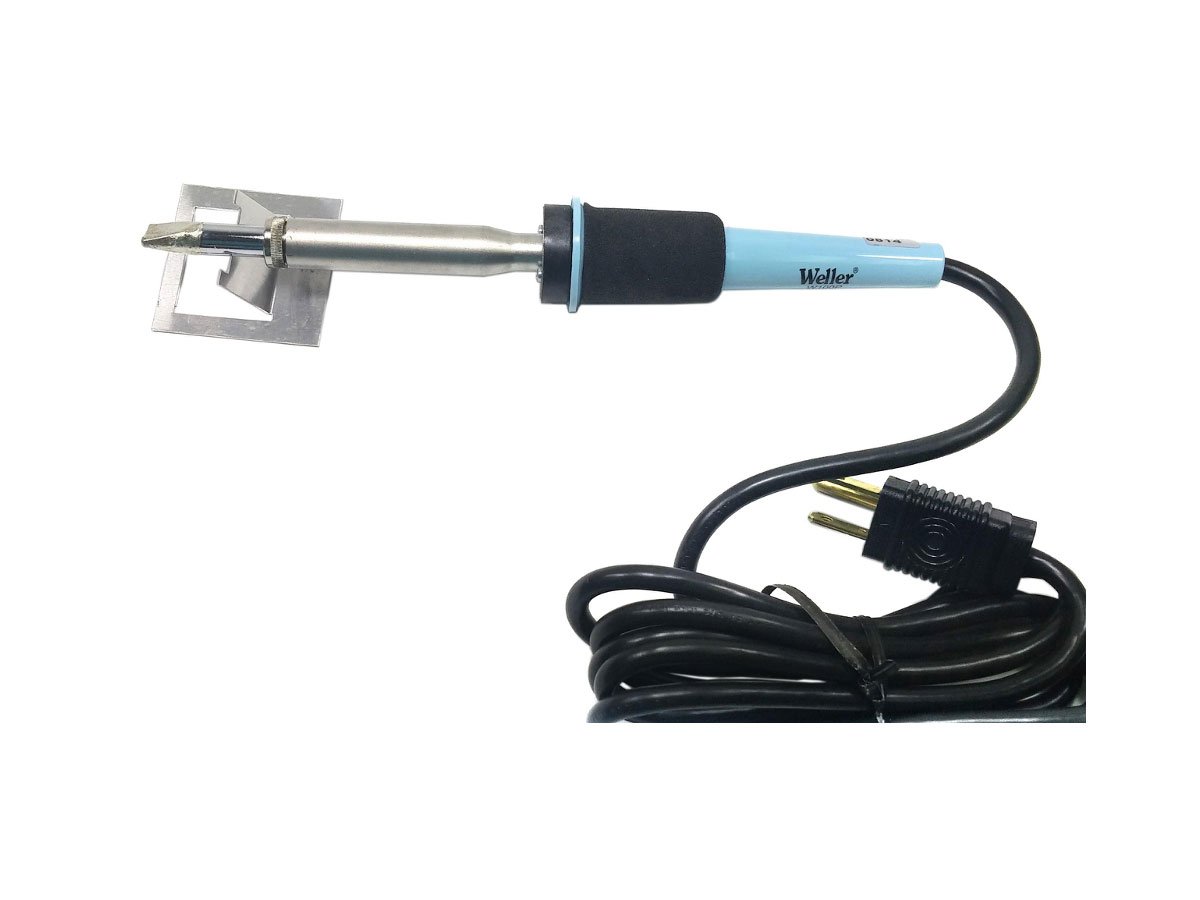
A Weller brand soldering gun
Soldering irons (or soldering “pencils” as they’re sometimes called) are what we’re interested in here. Unsurprisingly, they come in many shapes, sizes, and wattages. It’s important that you find a soldering iron that sits well in your hand and feels comfortable, as you’ll most likely be spending a lot of time wielding it as you learn. I personally like the irons with rubberized handles, as they allow me a nice, comfortable grip and tend not to fatigue my hands after prolonged use the way bare plastic does. You may find the plastic fine though. I believe some even have cork lined grips, which I haven’t tried, but would like to!
After comfort, wattage is the single most important soldering iron decision you can make. In fact, the vast majority of errors I’ve seen from beginners stems from using the wrong wattage iron for the job.
If the iron is too high of a wattage (e.g. too hot), you can actually physically damage or destroy what you’re working on entirely. Too much heat can lift the electronic traces on circuit boards clean off, break them, burn the underlying board itself, and/or destroy the components (resistors, capacitors, transistors, et al) you’re actually trying to solder.
If the iron is too low of a wattage for work (e.g. too cold), the solder won’t completely melt and form a good connection. The joint will be an ugly dull gray color instead of shiny, and it will be brittle and not hold up over time. You may have heard the term “cold solder joint” bandied about by techs, and this is exactly what this means. Whilst you won’t actually damage anything with iron that’s too cold (as opposed to too much heat), the work will be unreliable at best.
For circuit board work, you want something in the 25 to 30 watt range. For amps that have turret board, eyelet board, or point-to-point construction schemes, a 50 watt iron is usually sufficient. For the more massive jobs like grounding points on old Fender amp chassis, I have a monstrous 100 watt iron that suits that job. So, analyze what the job is and choose your weapons wisely. As soldering is my bread and butter, I invested in an adjustable temperature controlled solder station with a digital readout that I can use for just about everything I do EXCEPT for when I need that massive 100 watt iron.

A rudimentary soldering iron kit with extra tips and a digital readout built into the handle

The Weller WESD51 digital soldering station I use
The mammoth 100 watt iron I use for amplifier chassis grounding points. This iron doesn’t play around!
Next, we need to briefly discuss DEsoldering tools. When it comes to REMOVING components, there are essentially three options for removing solder: the desoldering iron, the “solder sucker,” and solder wick.
The desoldering iron is most often simply a regular soldering iron with a little squeeze bulb attached. The idea is to heat the joint until the solder is molten, and then use the bulb to suck in the solder. This works for some, but in my own experience this tool is more hassle than it’s worth. I don’t need a second (or third) live iron on my bench, and this device is way too fiddly for me. I primarily use a combination of the other two options.

Desoldering iron with attached squeeze-bulb
The solder sucker is in essence a hand-held, spring-loaded vacuum device. You press the plunger down, heat the joint, and depress a button on the side of the tool and it sucks the solder off the joint in about a second. I love it because it’s convenient, I can operate it with one hand, and it’s insanely effective. The reason, however, that I won’t use this tool on circuit boards is because when you activate it, it jumps a bit as its internal spring tension is released. This movement can very easily destroy delicate heated circuit board traces, so I only use this device on amps with eyelet, turret board, or point-to-point construction. I’ve had the best experiences with genuine “Soldapullt” brand solder suckers, but you can - and should - experiment to find out what works best for you.

The mighty soldapullt solder sucker
Finally, we come to the simple yet highly effective solder wick. This is a long, thin copper braid, and it comes in rolls of different widths. The idea here is to lay the braid over the joint to be desoldered and use the iron to melt the wick into the joint. As the solder melts, it’s “wicked” into the braid, leaving a nice, clean, solderless joint behind. This is the tool I use almost exclusively for circuit board work, as the wick is static and it removes the solder extremely gently with no external movement at all; it doesn’t jump like a solder sucker. Not all solder wicks are created equal though, so be advised. Some work amazingly well, some barely remove any solder at all - it can be pretty frustrating. My favorites are the N.T.E. branded wicks. I use the .098” width, which I’ve found to be the perfect size for most circuit board solder joints, and that brand has NEVER let me down.

Solder wick (AKA “desoldering braid”)
KEEPING IT CLEAN
Every few solder joints, you will notice excess solder (and sometimes toasted flux - which looks black) building up on the tip of your iron. You don’t want this, as these contaminants will compromise the integrity of future solder joints. To that end, there are many products on the market for tip cleaning - from pricey custom abrasives to tins filled with solid flux. However, I’ve found that the best and cheapest option is a simple wet sponge - just like the ones you have at your kitchen sinks. My soldering station has a sponge holder built in, and as long as the sponge is wet, all that one has to do is run the tip along it and it’s fully clean in under a second.
TIME TO SOLDER
Now that I’ve discussed all of the basics we need, it’s time to begin to actually solder some joints.
The first time you turn on your soldering iron (or any time you replace their tips - they DO wear out over time), you’ll need to “tin” said tip. All this means is that once the new iron (or new tip) is hot enough, you melt solder directly onto the tip itself. This coating protects the tip and promotes fast, easy soldering. Once the tip is coated, run it along the wet sponge (or tip cleaner of your choice) to remove the excess solder and you’re ready for action.
Now, ideally you want a good solid mechanical connection BEFORE you solder the joint (obviously this doesn’t apply to S.M.D. soldering, but THAT is a whole other topic for another day). Once you have the component’s lead through the board, it’s best to bend it at a right angle just under the board to hold it firmly in place and trim it after soldering.

Lead bent over the board at a 90 degree angle
The method I use is to touch the iron to the joint to be soldered for 1-2 seconds and THEN flow the solder onto the heated joint or circuit board trace. I then wait an additional 1-2 seconds. DO NOT hold the iron there any longer than this. On a circuit board, keeping things hot for too long can - as previously stated - damage the board or the components you’re trying to solder. This can happen here even if your iron is of the correct wattage. The skill takes practice and patience to perfect, so it’s best to teach yourself on an old circuit board or a pedal kit that you don’t care too much about. You’re not going to get it perfect right off the bat; don’t give up and try not to get frustrated. What you’re aiming for is a nice, round, shiny joint. It should look like a tiny mirror.

Action shot! Note the solder smoke!

Lead trimmed, solder joint nice, round, and shiny like a ball bearing.
Conversely, if you don’t keep things hot for long enough, you’ll get the dreaded cold solder joint. It will be dull, gray, flaky and just plain ugly. If this happens, REMOVE THE SOLDER COMPLETELY using the aforementioned desoldering tool of your choice and start again. Never, ever leave bad solder on a joint. You can’t throw good after bad here. It’s best to start from scratch.

Cold solder joints in a guitar control cavity. Gross. Yuck. Note the dull grey (instead of nice and shiny) appearance. Also you can see the uneven, mottled texture they have. This needs to be completely stripped out and redone with enough heat to permanently bond these metals.
If you’re soldering on a circuit board (which is what you’ll likely be working on most often), you MUST pay attention to adjacent solder joints when working. This especially applies if you’re building a pedal kit. It’s VERY easy to accidentally use too much solder on these tiny joints, and when that happens the solder “bleeds” on to adjacent connections. This erroneous connection is what’s known as a “solder bridge.” You really want to avoid this from the start at all costs, because solder bridges can be DEVILISH to find later when the pedal/amp/project you’re building doesn’t work correctly (or at all). If you’re just beginning, you won’t yet have the deep electrical knowledge to diagnose these problems quickly or effectively, and then you’ll wind up having to go back and check EVERYTHING. In fact, next to improper soldering iron wattage, this is the single most common error I see in the work of beginners. The trick is to use the smallest soldering iron tip you’re comfortable with, and also to use the smallest diameter solder you can. This will help ensure that all of your discrete solder joints remain just that … discreet.

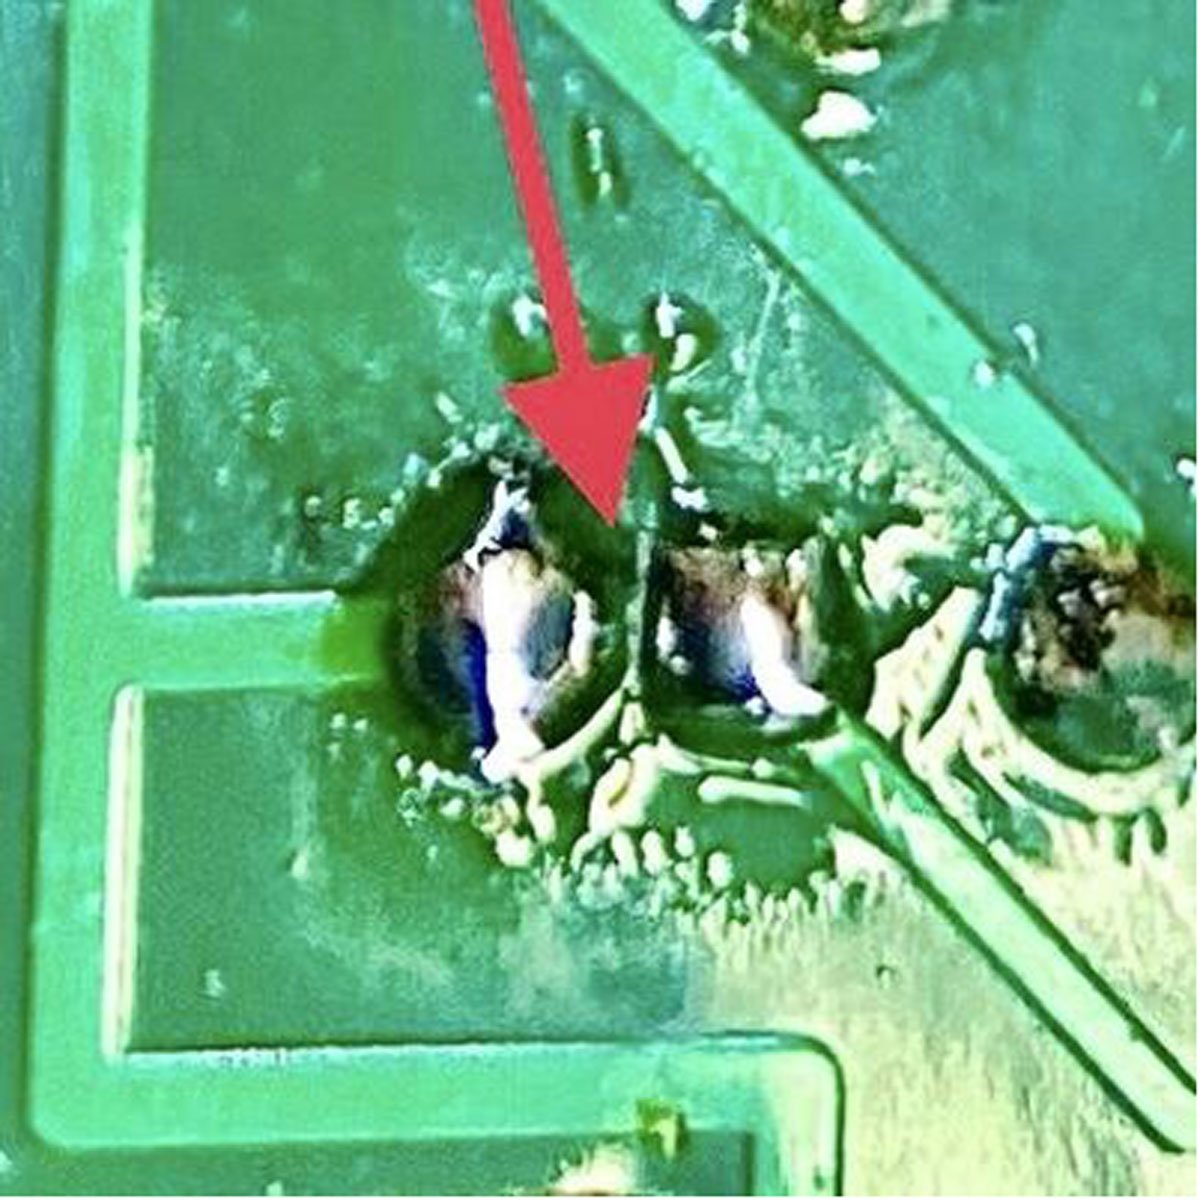
A solder bridge in a client-built guitar pedal (red arrow)
Re-soldered joints with solder bridge removed
Finally, once your project is built and working, you may want to remove any excess flux on the board. As previously touched on, this flux can trap contaminants in the air and become conductive. Take your Isopropyl alcohol and apply it SPARINGLY to a Q-tip and use THAT to carefully remove the flux until it’s gone. For larger flux removal projects I use a toothbrush to get the flux out of hard to reach areas.
HOT TIP (pun most definitely intended): the best solvent for removing flux I’ve found is Everclear. No kidding. It’s almost 100% pure grain alcohol, which is super effective for this purpose. The downside is that it’s pricey, and also in my case I’m pretty sure my local liquor store clerk thinks I’m a HUGE lush from the amount of this stuff I’ve regularly bought from her…and the kicker is that I don’t even drink!!!
You can also use a small flat-bladed jeweler’s screwdriver to GENTLY scrape away the flux. I’ve done it. You just have to be careful not to mar the board or damage any of the solder joints in the process.

This solder joint in a Marshall amp has excess dried flux all around it.

A Q-tip soaked in alcohol will clean it right up.

Good as new!
At any rate, once what you’re building works, all joints are nice and shiny, and the flux has been removed, you should be good to go. All of the info, tips, and tricks I’ve discussed herein should conspire to make your builds solid, stable, and last a lifetime (or more). Remember to have patience and go slowly. Be methodical, and you’ll be rewarded with a new fully functional amp, pedal, cable, or other product you’ve built yourself. To last!!!
Cheers until next time, and happy soldering!!

Lane Sparber is an amp / guitar / bass / pedal tech who lives and works in Fresh Meadows, Queens, New York. He started repairing gear in his mid-teens, and he’s 46 now, so you do the math. When not causing mayhem in his workshop, he can be found desperately trying to hide his latest orchid purchases from the rest of his family. You can find him on Instagram at @amptech74 or on Facebook at www.facebook.com/lane.sparber. Come say “Hello!”