Tech Talk with Joe Golden - Building a Pedalboard the EarthQuaker Way
Joe Golden
I hope that you were able to check out my last blog, which addressed power supplies. For continuity’s sake, let’s plow into the planning, layout, and assembly of your own pedal board!
We will also showcase another EQD employee rig, keeping with our “Rigs of EQD” feature. Let the toe tapping commence!
1. Test Your Layout
Lay out the pedals you want to use on a table or floor to get a feel for placement and spacing. If you have enough patch cables on hand, wire them up and see if the layout suits you. Pay attention to spacing, and general ease of use.
Organize the pedals based on signal flow to minimize long audio cable runs. Once you have things positioned where you like them, measure the dimensions of your layout: length X width. Cool, now you can order your board.
Some people like a flat pedalboard, some like a slight incline, or even a multi-tiered format. Get whatever makes your little pedal heart flutter. For everyday use here at EarthQuaker Devices, we're partial to Pedaltrain.
Be sure to think about how you’ll actually wire everything: are you hiding cable runs underneath, or just daisy chaining on top of the board?
Mock it up. It will save you some headaches in the end. When spacing the individual pedals, leave yourself some room for the cable ends, as they will add extra width to the pedal they are plugged into.
2. Think Before You Buy
We’ve all done it. That moment when inspiration and online shopping slam into each other, resulting in some hasty capitalistic fervor.
“I think that’s all I’ll need, let’s head to checkout.”
Then you click “buy,” unaware that you’re forgetting some crucial piece of gear!
To avoid this, simply make a list of all the things you need:
Pedal Board
Power Supply/DC power cabling
Audio Cabling
Fasteners for cinching your cables (zip ties, mounting bases for tidy wiring)
Velcro or other adhesive
Your pedals

3. Power Supply and Cabling
When purchasing a power supply there are a few things to consider:
How many power taps do you need?
How much current does each tap provide? Making a list of your pedals’ current consumption helps here.
Does it include DC cables? How many?
Do any of my pedals use nonstandard power supplies?
How big is the power supply? How will it be mounted to the pedalboard?
Grab your favorite audio cables. They can be hardwired or solderless. There are many different types of cabling, each with pros and cons, so don’t be afraid to troll the gear forums and see what’s what.

Buy some Velcro and cable ties in your preferred width and length. I prefer 3M Dual Lock Velcro. I also like to get some adhesive backed “mounting bases” that will make cable runs more discreet.

4. Put it all Together
Alright, you got all your supplies! Here are some tips for wiring it all up.
Install the Power Supply
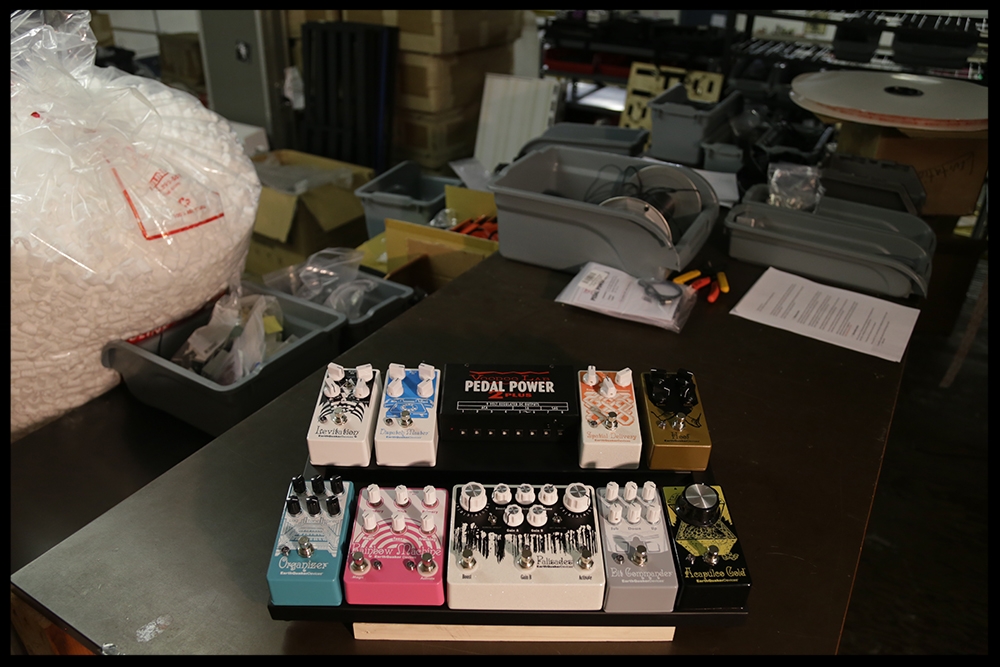
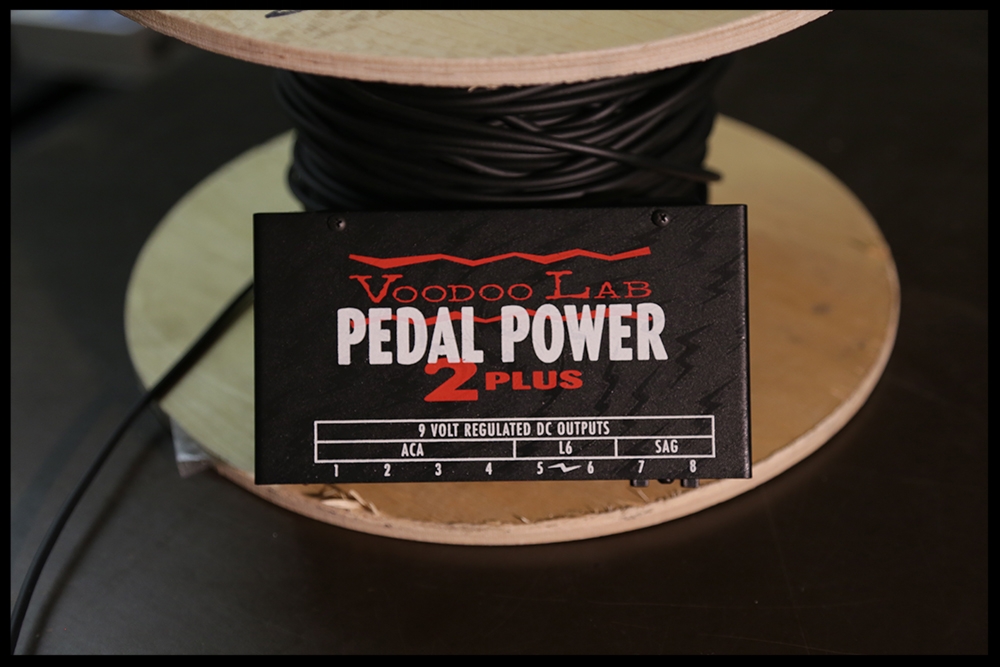
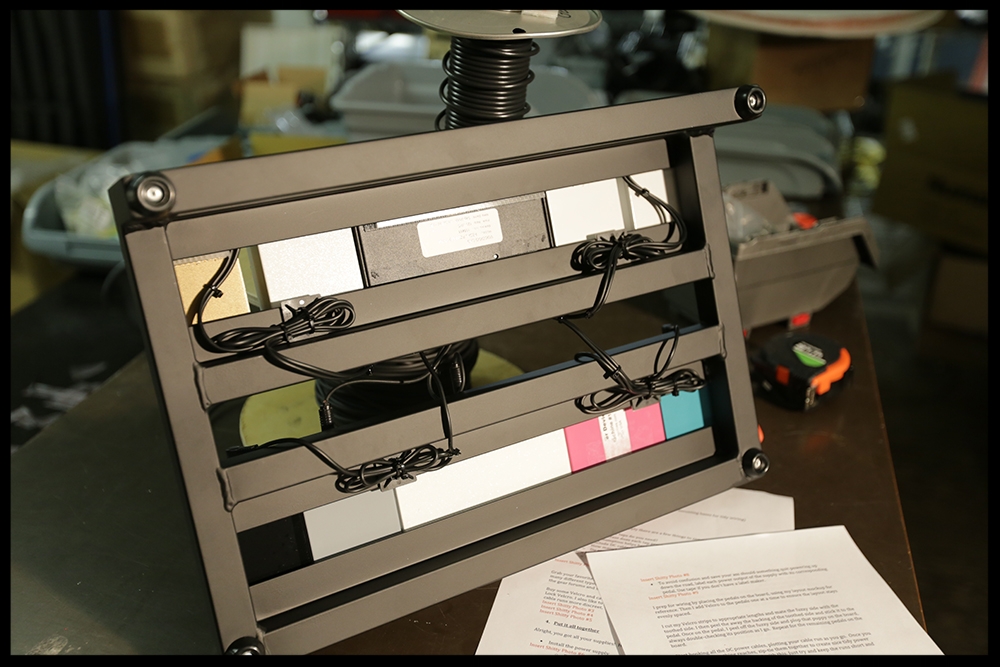
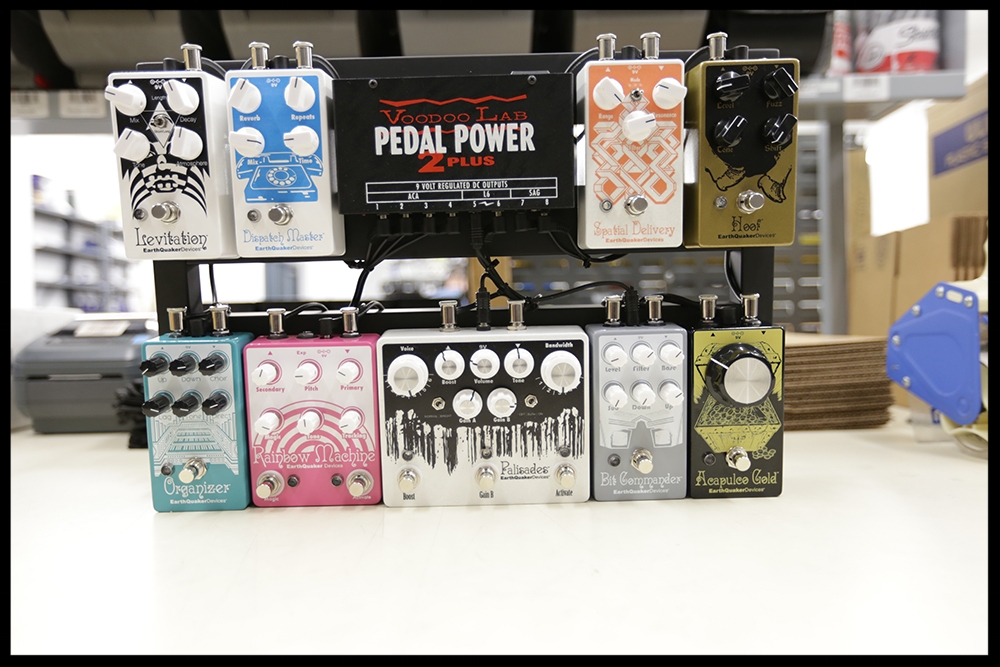
Be sure to put some thought into power supply placement. You want the DC barrel cables to be able to reach all the pedals you’re trying to power and you want easy access to the AC cable jack for plugging your pedalboard into the wall. We typically reach for a Voodoo Lab Pedal Power 2 Plus.

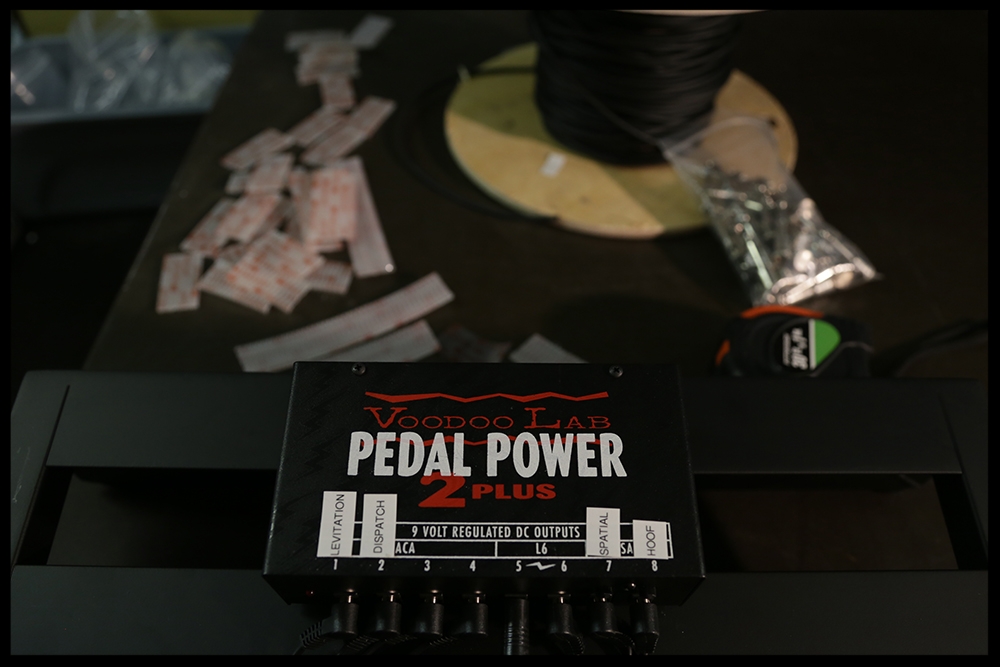
To avoid confusion and save your ass should something quit powering up down the road, label each power output of the supply with its corresponding pedal. Use tape if you don’t have a label maker.
Attach Pedals to the Pedalboard
I prep for wiring by placing the pedals on the board, using my layout mockup for reference. Then I add Velcro to the pedals one at a time to ensure the layout stays evenly spaced.
I cut my Velcro strips to appropriate lengths and mate the fuzzy side with the toothed side. I then peel the away the backing of the toothed side and stick it to the pedal. Once on the pedal, I peel off the fuzzy side and plop that puppy on the board, always double-checking its position as I go. Repeat for the remaining pedals on the board.
Power Supply and Audio Cable Wiring
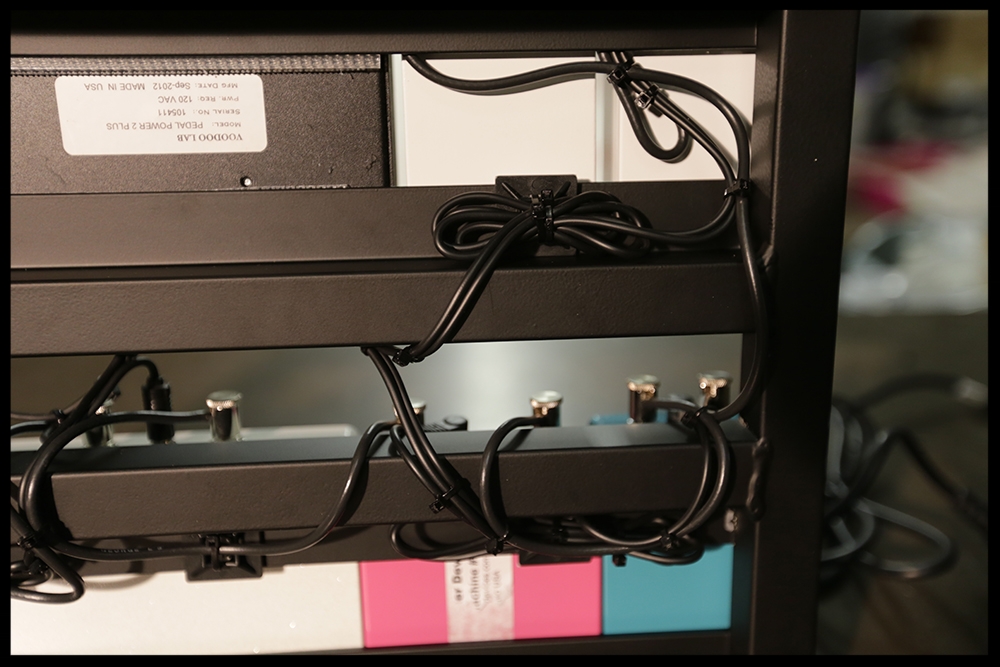
Start hooking all the DC power cables, plotting your cable run as you go. Once you confirm that everything reaches, zip-tie them together to create nice tidy power runs. I don’t really get crazy exact with this. Just try and keep the runs short and neat.

After all your DC cables are cinched down and ‘perty lookin', power ‘em up and make sure all the pedals power up. Hopefully they are good to go!
Finally, repeat the cabling process but with ¼” audio cables this time, starting with the last pedal in your chain.
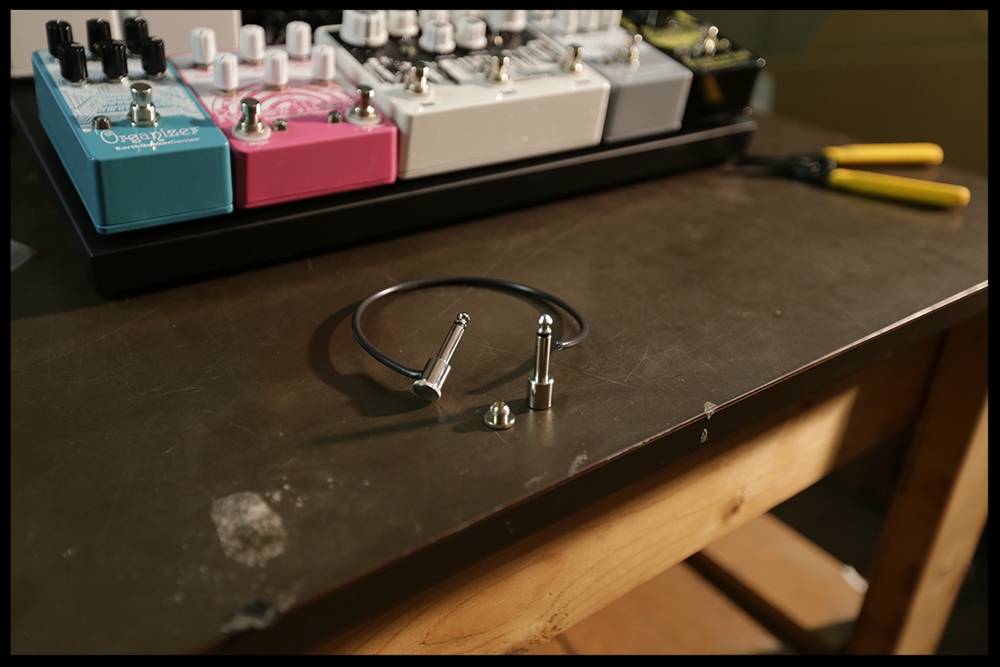


If you are using solderless cable I recommend that you plug the output to the last pedal in the chain into your amp, and check each cable that you make from that point to the beginning of your chain. One cable at a time.
Solderless cables are great, but if you terminate the whole batch and install all at once, finding a failed cable can be a pain. So plug a guitar into the last pedal and start there. Add a patch cable to the next pedal, plugging the guitar into the pedal you just patched, working toward the beginning of your effect chain. Once wired up, try it out and make sure everything works satisfactorily.
Once it’s sounding good and solid, repeat the cinching technique you used on the DC power cables with the ¼” audio cables and make it look as good as you can.
Voila! Pedal Board!
5. Pedalboard Hacks
Power Supply "Breakout Box"
Sometimes I try and stretch the power supply by building what I call a “breakout box.” This little dude is dope, because it uses the highest current tap on your power supply to feed a daisy chain box. Although it’s housed in an enclosure, it’s similar to your standard daisy chaining cable.
The concept is that you can use the “breakout” to extend the amount of power outputs available to you. The drawbacks are that your gear must not demand more current than is available. And each power output won’t be isolated. So, it’s best to know what current draw each pedal on the “breakout” will have.
Try to always maintain 25-50% headroom - i.e. for pedals drawing 300ma, use a 400ma tap on your power supply. More on that in another blog.
Rigs Of EQD
In this installment of Rigs of EQD, we have resident Warr Guitar and Chapman Stick guru Morgan Phelps.

Morgan is builder at EQD and brings precision and efficiency to everything he’s involved with. He’s a husband, father of two, and always has copious musical endeavors brewing. Check out his band, Co_Conspirator, and bear witness to the tone.
Warr Touch Guitars:

12 string Raptor Series (Pauduk body, maple neck w/Pau Ferro fretboard and Bartolini electronics)
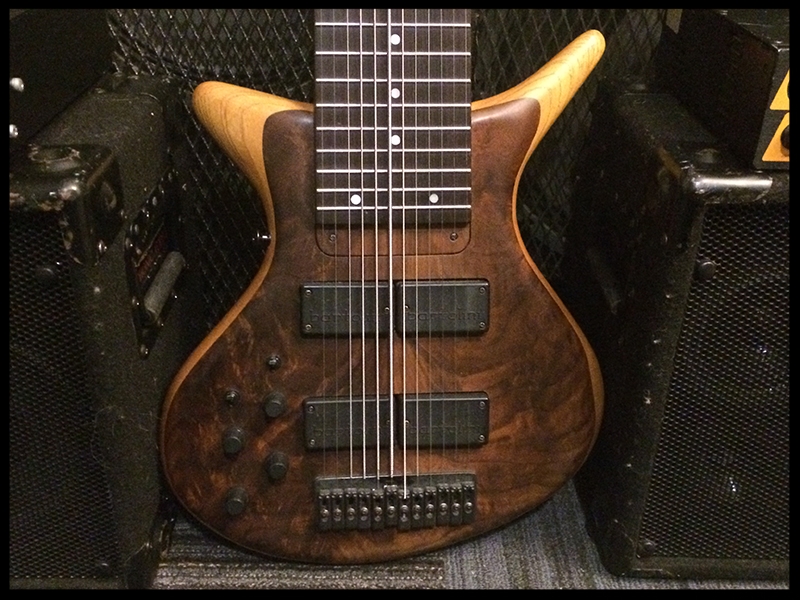
12 string Artist Series (swamp ash/walnut body, maple/wenge/tarara neck w/wenge fretboard, Bartolini electronics)
Tuning:
Bass Side: ADGCFBb high-to-low
Melody Side: BEADGC low-to-high
Each grouping of 6 strings have their own separate pickups, preamps and outputs.
Amplification:
![2 MarkBass Little Mark II bass heads2 Euphonic Audio VL-108 Cabinets (solo gigs and studio)SWR Triad [bass side] SWR 212 [melody side] (full band gigs)](https://images.squarespace-cdn.com/content/v1/57cebe2c03596e075fca5f24/1480344169159-VCTYWLRRGL1Y4TBE75K2/image-asset.jpeg)
2 MarkBass Little Mark II bass heads
2 Euphonic Audio VL-108 Cabinets (solo gigs and studio)
SWR Triad [bass side] SWR 212 [melody side] (full band gigs)
Pedals
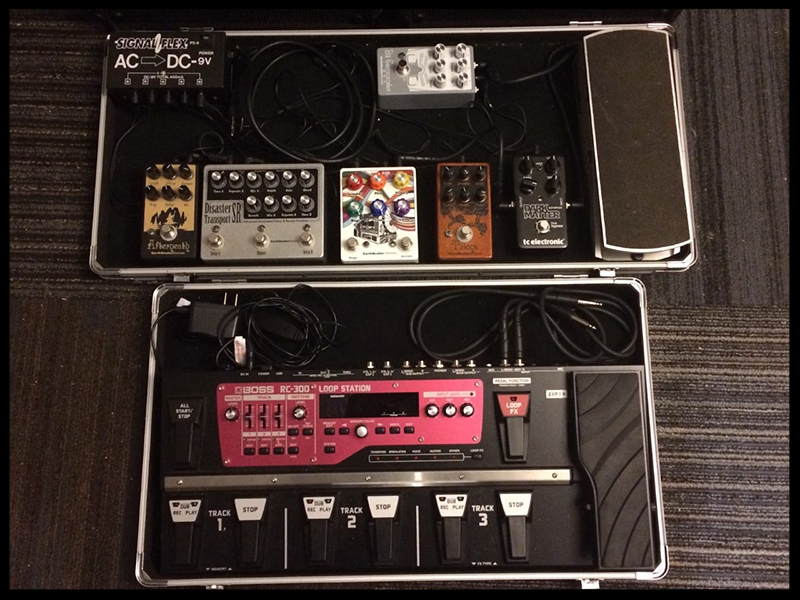
Bass Side - EQD Talons and Electro-Harmonix Little Big Muff
Melody Side - EQD Bit Commander, Rainbow Machine, Disaster Transport Sr., Afterneath, TC Electronics Dark Matter, Ernie Ball Volume Pedal.

Both Sides - Line 6 DL-4, NUX Timecore and Modcore pedals, Boss RC-300 stereo multitrack looper. These pedals are stereo in and out to process both sides at once.
That does it folks! Send us your favorite pedalboard hacks and rigs of EQD in the comments!
'Til next time,
Joe

Joe Golden is a circuit builder and amp designer at EarthQuaker Devices. His touring and recording credits include Bernie Worrel (Parliament / Funkadelic, Talking Heads), Chrissy Hynde, and the Dirty Dozen Brass Band. He currently plays guitar in the Mark Leach band and is a Fender certified amp technician. His writing has appeared in Premier Guitar. Joe lives in Akron, Ohio.